
Do you know how to install and replace a Kohler toilet flush valve? Do you need to install or replace your Kohler toilet fill valve? This blog post will help guide you through the process of how to do so, step by step. We will cover the installation of both the flush and fill valves for Kohler toilets, as well as their replacement.
This guide will walk you through the process of installing and replacing Kohler toilet flush valves. The first step is to identify which valve it is that needs to be replaced or installed on your toilet. There are two different types of Kohler toilet fill valves: one for leaking, and another for flushing (fill). This blog post focuses only on installing a new flush-type fill valve because this usually occurs when there’s an issue with the old one…
What is A Toilet Flush Valve?
Let me explain about a toilet flush valve for you. Hope you can understand its type and the necessary for a toilet.
- A toilet flush valve is located in the base of your toilet and controls how much water flows into it.
- It’s usually a metal or plastic pipe connected to a nut that sits on top of the bowl drainpipe, with an angled opening so as not to let too much water escape when you push down on it for flushing purposes.
- The height at which this fill valve is positioned in relation to the level of water inside can be adjusted by turning a screw set near its top. This allows adjustments based upon whether your household has low or high ground pressure, meaning there are more people using toilets than usual (high), or fewer people living under one roof (low).
Toilet Flush Valve: Why Are There Two Different Types?
There are two types of toilet flush valves available: the ballcock and the more conventional flush valve.
The newer type called a tankless toilet fill valve is much less prone to wear-and-tear or clogging than its predecessor version that relies on a rubber flap for containment of water flow into the tank during use.
This alternative is also easier to install and remove if needed, as it does not require any tools other than your hands. The only time you would need additional equipment with this style of device is when there are issues with installation due to an impeding obstruction inside the bowl hole and/or overflow pipe; then plumber’s tape might be required based upon specific needs in these instances (typically determined by plumbing professionals).
Ballcock Toilet Flush Valve
Let me explain about a Ballcock toilet flush valve for you.
A Ballcock toilet flush valve is a type of plumbing device that uses water pressure to expel waste from the bowl. The difference, however, between this and other devices like chain-pull toilets or tank ballcocks (the latter being for tanks with overflow drains), is that it does not have an inlet pipe connection at the bottom of the tank as these others do.
This means that so long as there’s enough air left inside your toilet cistern when you flush it, any old sediment will be flushed out instead of getting stirred up by new incoming dirty water; plus if anything ever goes wrong with one part and needs replacing then only one unit would need changing rather than two!
Tankless Toilet Flush Valve
A Tankless toilet flush valve is a plumbing device that uses water pressure to expel waste from the bowl. The difference, however, between this and other devices like chain-pull toilets or tank ballcocks (the latter being for tanks with overflow drains), is that it does not have an inlet pipe connection at the bottom of the tank as these others do.
This means that so long as there’s enough air left inside your toilet cistern when you flush it, any old sediment will be flushed out instead of getting stirred up by new incoming dirty water; plus if anything ever goes wrong with one part and needs replacing then only one unit would need changing rather than two!
The downside to Tankless Toilets Flush Valves is their cost since they are more expensive to buy and install than other toilet parts.
The upside is that they should last longer as there’s less wear on the components involved. Plus, if you ever have a power cut then your water will still be flowing in case of any emergency situations – whereas with older flush valves this might not happen!
A plumber typically installs Tankless Toilet Flush Valves by first turning off the water supply coming into the cistern which would need closing after flushing for safety reasons while he works; next, he’ll remove the old valve from its place using an adjustable spanner or Allen key before installing a new one in the same way; finally, turn everything back on again so it fills up and starts working correctly.
This process is usually relatively quick, especially with newer models that use a push-button mechanism to release the flush.
Tankless Toilet Flush Valves are great if you’re installing your toilet in an area without access to a water supply as they’ll work just fine on battery power alone – and Kohler toilets flush valves have been designed specifically so there’s no need for electrician skills or knowledge! If you don’t want to get tangled up in any of those complicated tasks then this is definitely the product for you.
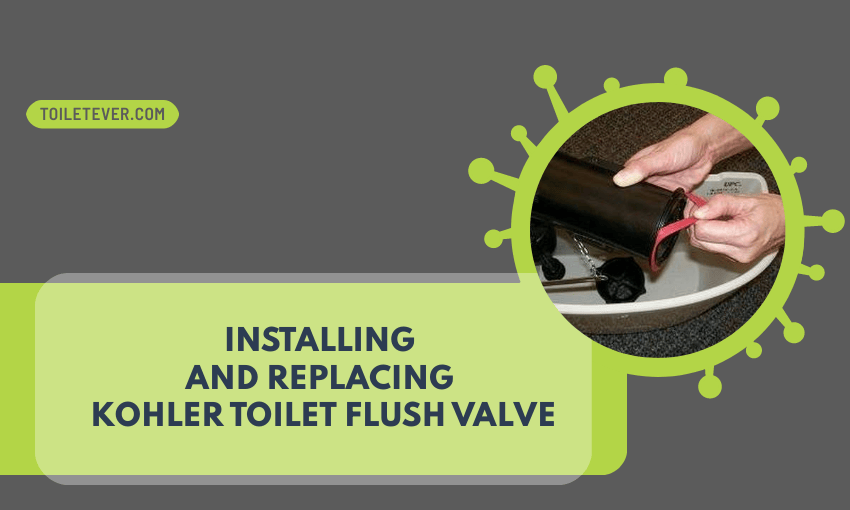
Installing A New Kohler Toilet Flush Valve
In order to install a new Kohler toilet fill valve, you’ll need access inside your tank from underneath the bowl. Reach into the tank from underneath and find where the existing pipe connects to at its endpoint on top of your tank… You can now remove excess water from the tank, disconnect the old valve and its connecting pipe from your toilet, attach a new flush type fill valve in place of the old one.
Once you’ve secured everything back into position on top of your tank, you can now reconnect it to your toilet by attaching this end onto an opening at an opposite side of your bowl… When tightening any bolts or screws that may have been loosened previously during installation, always make sure they are tight. A good way to know if something is too loose would be checking for leaks around where the bolts were tightened down when underwater pressure vacuum tests all connections underneath before securing them with liberal amounts of plumber’s putty (or silicone). Lastly replace both caps found inside each connection point: cap #A is for the fill valve, and cap #B is for the flush handle.
Place your old one in a safe place so you can remember what it looks like when installing your new one back on. The first step to installing your new Kohler toilet flush valve will be removing any screws that are holding down the old one – these might have been loosened already during installation of your tank or may have come loose due to wear and tear from use over time… When replacing just the fill type valves (no handles), you will not have to replace the flush handle- that is done separately.
Remove both caps found inside each connection point (cap #A for fill valve, cap #B for flush handle). Fill up your toilet bowl with water and then remove any excess so it doesn’t overflow when you turn on the new one. Place back in old Kohler Flush Valve if needed to remember what it looks like before installing a new one. If there are no screws holding down the old Kohler Toilet Flush Valve, use pliers or channel locks to unscrew from its base…
Install your new Kohler Toilet Flush Valve by using either a wrench or screwdriver – whichever is most accessible – tighten securely but do not over-torque.
Replacing A Kohler Toilet Flush Valve
When you will need to replace a Kohler toilet flush valve? And what is the best way to replace it? Well, let me explain. Kohler toilet flush valves are a bit different than other brands. They come in two styles, the push-button type, and the handle style. I will be talking about replacing both of these types today. The first thing you need to do is figure out what kind of Kohler Toilet Flush Valve you have so that you can get parts for it correctly…
Step A – Find Out the Problem: For simplicity’s sake, we’re going with ‘handle’ here – but if your valve does not have an inlet pipe coming up from below where the tank sits then refer to Step #B instead] If there are no screws holding down the old Kohler Toilet Flush Valve, use pliers or channel locks to unscrew from its base (it may take some elbow grease).
NOTE: If the old Kohler Toilet Flush Valve has an inlet pipe coming up from below where the tank sits, then skip to Step #B] Once you have unscrewed it–if there are no additional screws holding down the base of your old toilet flush valve (not all models will have this)–you can either remove or reuse. This is a personal preference as long as it is not leaking water when flushed.
Step B – Replacing It with Handle Style: There should be two nuts at both ends of the handle on top and bottom of your new Kohler toilet flush valve that should use pliers to unscrew them. You’ll need to slide off any mounting clips for the old toilet flush valve that are still attached to the tank. Then you can attach your new handle style Kohler Toilet Flush Valve by replacing and tightening these two nuts at both ends of the handle on top and bottom.
NOTE: If there is an inlet pipe coming up from below where the tank sits, then skip this step because it will take a little more work for the installation of your new Kohler toilet flush valve.
STEP C – Replacing It with Inline Style: There should be three screws holding down the base plate (ring) over top of your water inlet hole beneath where your tank sits. You’ll need to unscrew them–if they’re hex type, use pliers; if Phillips or flathead, use a screwdriver–and you can pull the ring and base plate off.
Once there is no longer any need to keep these screws in place (think of it like removing one’s pants), then attach your new Kohler toilet flush valve by replacing and tightening three more bolts underneath where the old toilet flush valve was located at both ends with nuts on top as well as the bottom.
NOTE: If there is an outlet pipe coming up from below where the tank sits, then skip this step because it will take a little more work for the installation of your new Kohler Toilet Flush Valve.
Step D – Replacing It with Gravity Feed Style: There should be four screws holding down the base plate (ring) over the top of the tank.
Step E – Replacing It with Pressure Feed Style: There will be a couple of hoses connecting the toilet fill valve to the water pipes on top and underneath your toilet flush valve, make sure that no kinks or twists occur in these rubber hose connections because they are considered to be more important than anything else when it comes to how you can avoid any type of problems later on.
You should remove clamps from both ends of each pipe connection (make sure not to lose them), then loosen three bolts around the area where gravity feed style is installed–these bolts will need removing completely before installing this new Kohler Toilet Flush Valve in place.
Step F – Removing Old One First: If there is anything left in the water tank, first you should turn off your toilet fill valve and flush it to drain out any remaining water.
Step G – Remove all bolts around the area where the old Kohler Toilet Flush Valve is installed: It’s best to remove these completely before installing new ones in place–you can use pliers or a wrench if needed, but be careful not to damage them.
Step H – Install New One Around Same Area: When re-installing this new Kohler toilet flush valve make sure that its hose connections are good and tight before tightening any of those three bolts on top and then underneath (again, do not overtighten). If clamps were removed from pipes during the installation process just reinstall them.
Step I – Put back toilet tank lid: Reattach the Kohler Toilet Flush Valve to this toilet tank lid by putting on those two screws that you removed from it earlier and then tighten them according to the size of screw holes, again–do not overtighten these screws because they could snap off easily!
Step J- Test for Leaks: After all is done testing for leaks with a bucket should be pretty easy as there shouldn’t be any water left in your pipes anymore and so once the Kohler toilet flush valve is installed leak-free no more need to worry about spilling or unnecessary wastefulness.
Tips: If anything goes wrong during the installation or replacing process just contact customer service. They must help you as quickly and efficiently as possible!
Conclusion
Hope you got the chance to learn about how to install or replace a toilet tank lid and the flush valve.
Now that you know these simple steps, it should be easy for you to handle this task! You will save time, effort, and money by not having to call in professional help every time the need arises. Just try out these tips next time one of your Kohler toilet’s parts breaks down and enjoy all the benefits they offer!
Thanks for reading; we hope our article has helped make things easier for you. Remember that if anything goes wrong during the installation or replacement process just contact customer service–they must help you as quickly and efficiently as possible! Overall, be prepared with everything before starting any work on your plumbing system so that nothing is left to chance!